How to Itemize Invoices For Improved Clarity
Your invoices are obviously the route to getting you paid, but if they’re not itemized correctly, it could delay payment and invite queries from your clients, sometimes even resulting in aged receivables. Much like a path filled with obstacles, every roadblock keeps you from your hard-earned money.

However, by implementing some simple tips, you can make sure your invoices are clear, insightful, and most importantly, paid on time. You can then get onto the next job, where the cycle starts again.
A better way to manage your finances
With Hiveage you can send elegant invoices to your customers, accept online payments, and manage your team — all in one place.
In this article, we’ll discuss how to itemize correctly, and provide some handy tips for creating an itemized invoice. Let’s get started!
The Benefits of Itemizing Your Invoices Correctly
Before we move on, let’s discuss what ‘itemization’ is. In very simple terms, it means describing the work you’ve done, and providing a cost. In other words, it’s a breakdown of what you’ve completed, with an associated cost for each:
Just from that short description, you can probably glean why itemization is a boon for your clients and customers. For one, they get to see exactly what they’re paying for, and how the cost is apportioned. This makes paying an invoice super-speedy for them, as they simply need to eyeball the invoice and initiate payment.
However, while prompt payment is a benefit, it can also make conflict resolution more streamlined. For example, all but the most complex queries shouldn’t take more than a glance to resolve given the level of detail you’ll provide. The invoice should show exactly what work you carried out, and the cost breakdown. Anything less will result in a protracted resolution process.
Create an Itemized Invoice for Improved Clarity
You’ll be pleased to know that creating an itemized invoice is a simple process, and relies on some common sense tips. Here are just three of them!
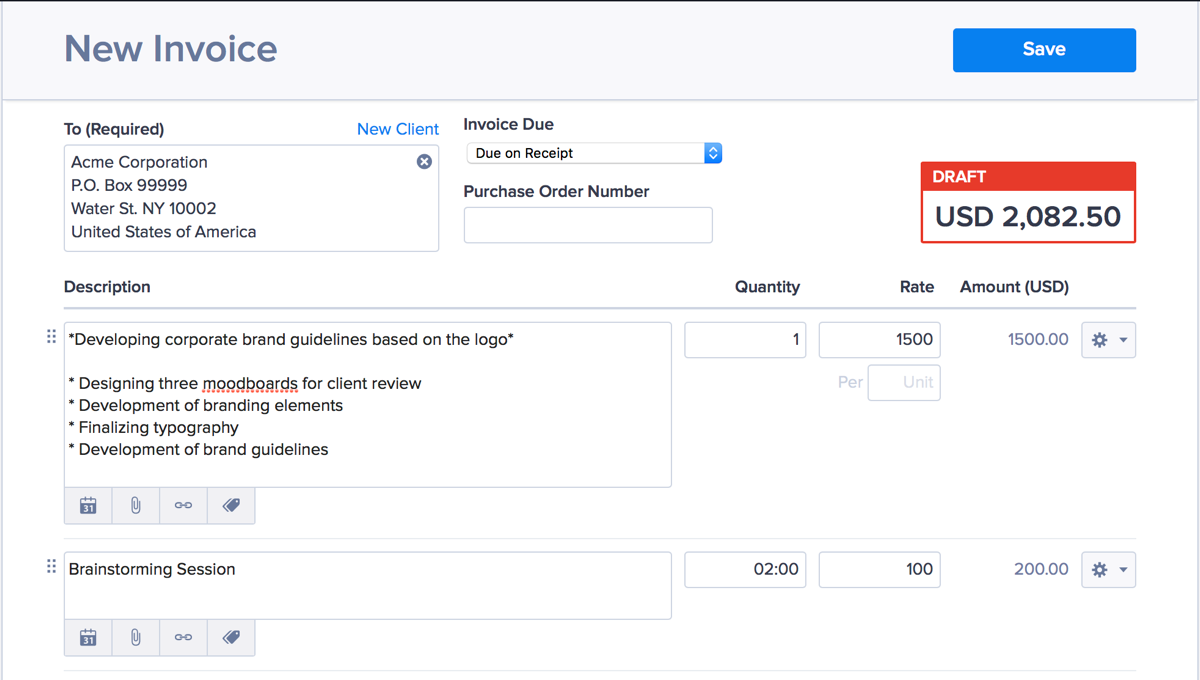
1. Offer Direct and Understandable Descriptions
First, a primary barrier to accepting payment for a customer or client is unclear descriptions. After all, if a line simply states “Works rendered”, there’s little to tell the client what this actually refers to and whether the charge is correct. This has a knock-on effect, because you’ll be called upon to provide clarity – which can cause unnecessary delays.
In short, everything on an invoice should be centered around offering the client one action: paying their invoice. This means they should be able to answer the questions Is the cost for this work correct? and Do I understand what I’m paying for? If those answers are “No” in either case, your descriptions need some work.
Fortunately, this is an easy fix. We’d advise providing as much detail as you can give in one line. Of course, this depends on the work you’ve carried out, but we’d also recommend splitting apart bigger tasks into easy-to-grasp sub-entries.
2. Break Apart Larger Projects Into Smaller Itemized Chunks
Quite often, you won’t be completing just one or two small jobs for a client, but a larger project made up of many sub-tasks. Depending on the job itself, there’s nothing wrong with simply keeping the project on one line, especially if you’ve already agreed the full cost.
However, splitting the project into multiple entries that are priced accordingly lets your client see two things:
- The exact work you’ve done.
- How much each task costs.
Besides ensuring fast payment, this has another benefit. By breaking down each task in a project, the client could be tempted to extend work with you based on each task’s individual price.
What’s more, they’re also able to budget for future projects internally without involving you initially. There’s also a benefit when getting those budgets approved by superiors.
The good news is that if you’ve got the rest of your itemization in order, breaking a project up into its components should be a snap. However, you can start this process right from the very beginning with Hiveage’s estimation functionality:
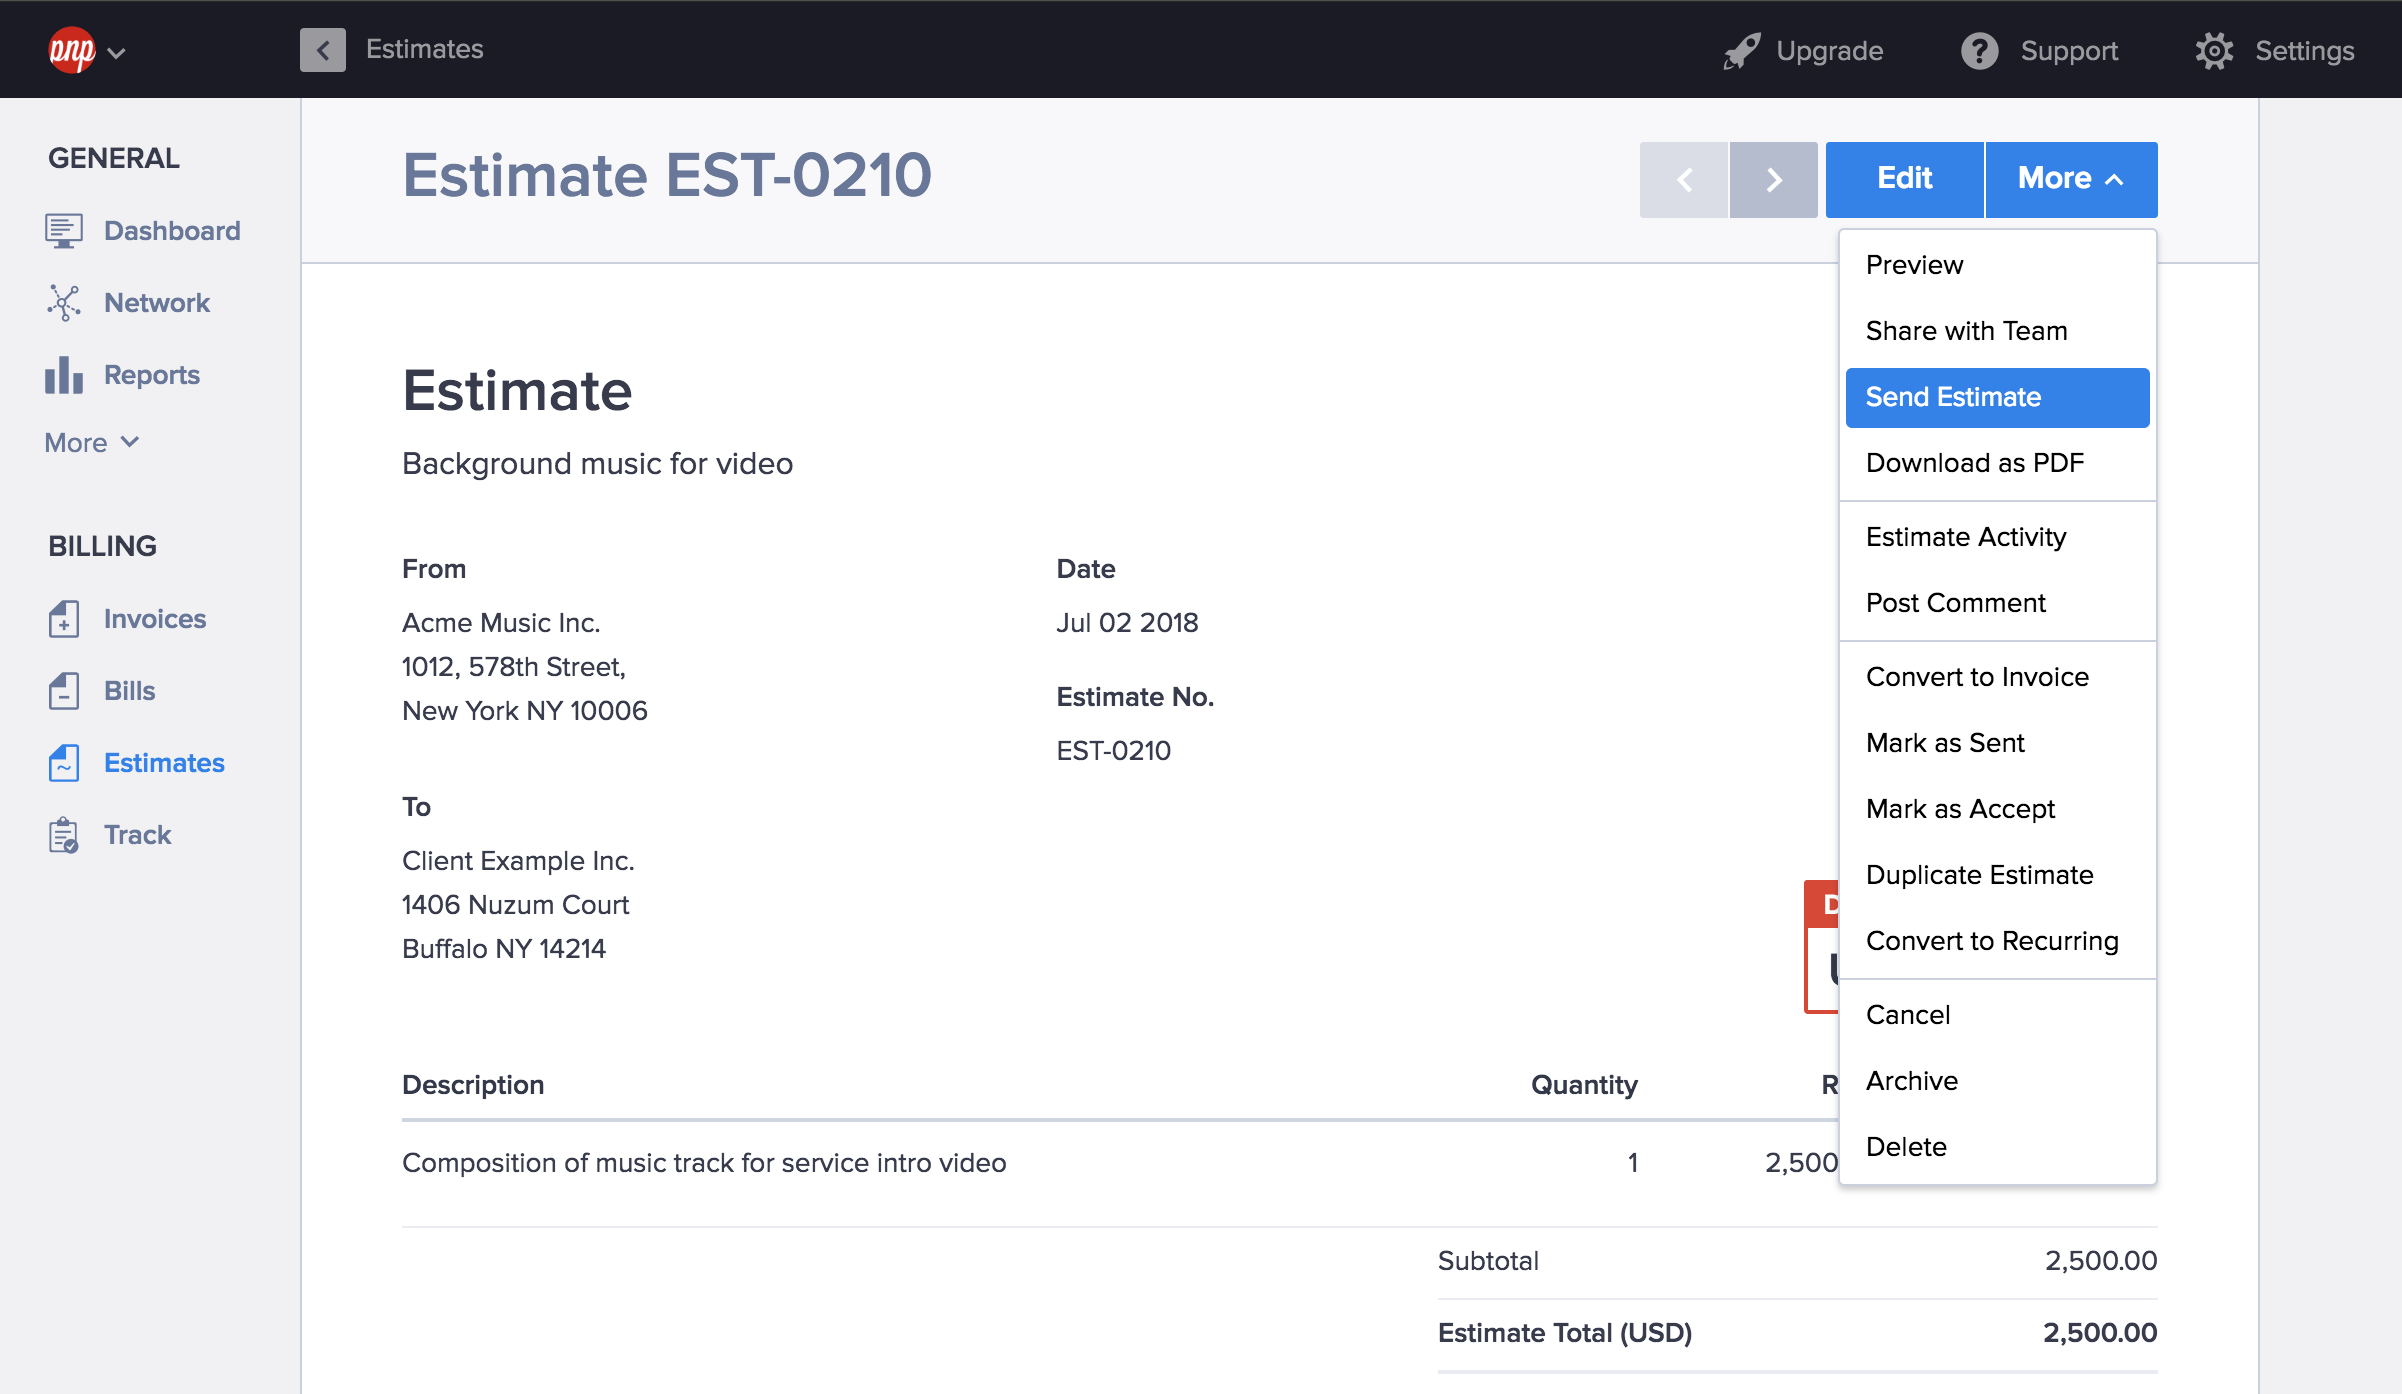
Here, you can provide an itemized quote to your client from the off, and turn it into an invoice at the end of a project. By itemizing at the start, you can issue a full invoice in seconds, which provides yet another clear road towards a deposited invoice.
3. Don’t Forget to Itemize Your Costs Too
Finally, we have an itemization element you may not have considered previously. While the tasks you complete should be fully itemized, so should the cost of those tasks.
Simply put, by breaking down the cost with itemized invoicing, the client will be able to not just see the total price for each entry, but the time-based rate if applicable, along with any unit cost associated with the job.
As we’ve implied throughout this article, giving the client as much information as possible frees them up to pay an invoice. A complete cost breakdown is just another aspect that can help.
However, creating itemized bills requires some thought. You’ll certainly need to show the overall total of the entry in question, but the breakdown of that total depends on your niche or business. Usually, you’ll include some of the following:
- A unit amount, if you sell products or services in multiples.
- The time-based charge, such as an hourly rate (if you’re a freelancer or creative)
- The rate per unit, which usually ties into both of the above.
The good news is that most invoicing software worth its salt provides the ability to break costs down into units and rates, so regardless of your chosen solution, you’ll be able to create an itemized bill without fuss.
Conclusion: How to Use an Itemized Invoice Template
The easier you make it for your client to pay, the faster your income grows. Itemizing your invoices for absolute clarity can help ensure that the payment process goes smoothly. After all, without a clear breakdown of the work you’ve carried out, a client will have to work through queries – which is a lose-lose for both parties.
In this post, we’ve looked at how to itemize your invoices for improved clarity. We believe there are three tips to take forward:
- Make sure the descriptions of each task or job are clear, and easy to understand.
- You may need to break down larger projects into smaller tasks.
- Itemize the costs of a job to help your clients figure out if they’re being charged correctly.
Do you have any tips for offering clear itemized billing? Let us know in the comments section below!